Software Installation
Before we can begin containerizing our workflows, you will need to set up your local environment.
1. Create a Docker Hub Account
Docker Hub is the primary registry for Docker images (think of it as GitHub, but for software containers). We will use it to pull pre-built environments and host our own.
- Navigate to Docker Hub
- Click Register and create a free personal account.
- Verify your email address and save your login credentials, as you will need to log in via the command line later.
2. Install Docker Desktop
Docker Desktop is the easiest way to run Docker on your local machine. It includes the Docker daemon, the Docker CLI, and Docker Compose.
- Navigate to the Get Docker documentation.
- Download the appropriate installer for your operating system.
Download Docker Desktop for Windows. Ensure you have WSL 2 (Windows Subsystem for Linux) enabled, as Docker relies on it for optimal performance.
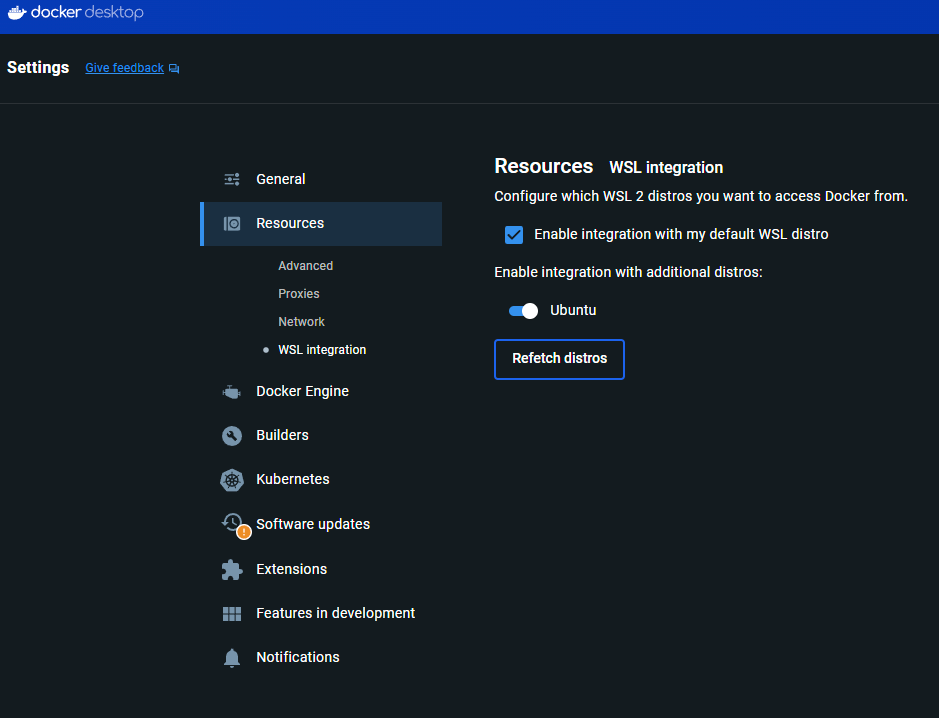
To ensure this is configured correctly, open your Docker Desktop Settings, navigate to Resources > WSL Integration, and make sure the integration is enabled for your default WSL distribution:
Download Docker Desktop for Mac. Pay close attention to whether you are downloading the version for Intel chips or Apple Silicon (M-series chips), as they have different installers.
Follow the repository installation instructions specific to your distribution (Ubuntu, Debian, Fedora, etc.) provided in the Docker documentation.
Verify Your Installation
Once installed, open your terminal (or PowerShell) and run the following command to ensure Docker is responding: